
 中文 (台灣)
  日本語
日本語  한국어
한국어  Italiano
  Français
  Português
  Español
 Brief Introduction
MusicFre is an all-in-one music downloader and converter designed to help users easily enjoy and manage their favorite music.
With just one software, you can download, convert, and manage music from multiple sources in high quality, including Spotify and YouTube. MusicFre supports a wide range of audio formats and provides a smooth, fast, and stable experience for both beginners and professionals. Therefore, you can convert your streaming music to any format like MP3, WAV, FLAC, AAC, and more.
What’s more, it also provides enhanced audio processing features to improve listening quality and ensure a better music experience.
Choose MusicFre, and you can easily convert your music in just 3 simple steps. Let’s see how it works now.
How to Install MusicFre
The download and installation of MusicFre is simple and easy. Get the simple steps here.
1System Requirements
MusicFre is a desktop software that supports Windows 7/8/10/11. To ensure the best experience, please make sure your system meets the basic requirements before installation.
2Download MusicFre
MusicFre provides Windows versions. The download button below will automatically match your system and provide the correct installation package. Click the button to download.
3Install MusicFre
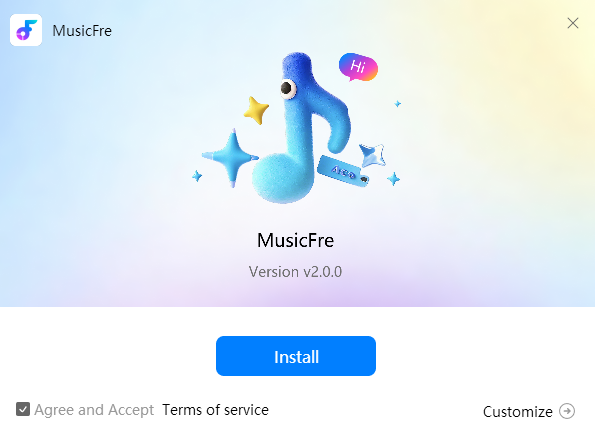
Step 1. Left-click the downloaded “musicfre.exe” file in your browser’s download history.
Step 2. Click “Yes.” A confirmation window will appear. You can also choose “Customize” to select the language and installation path.
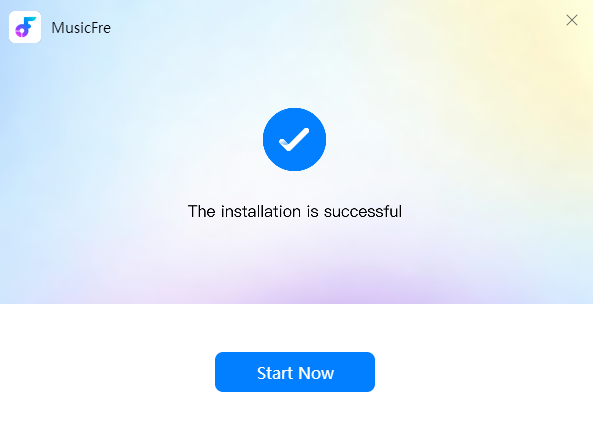
Step 3. Click “Start Now.” Then, the program will launch automatically so you can begin using its features.
How to Register MusicFre Account
MusicFre allows you to convert 3 songs to MP3 format for free. But if you want to convert more songs to other formats, please register and upgrade first.
If you are already a MusicFre user, you can directly log in with your existing account.
For New Users:
Step 1. Click the “Login” icon > “Create account” to go to the registration page.
Step 2. Enter your email address, password. Then click “Create Account” to complete registration.
Buy MusicFre VIP Benefits and Unlock Full Version
To unlock all premium features, you can upgrade to MusicFre VIP membership.
You can check pricing here:
Step 1. Launch MusicFre. Click the “Buy Now” button inside the MusicFre software to view available plans and pricing.
Step 2. Choose a plan, then click the “BUY NOW” button. Please note that MusicFre does not offer a subscription model, so you will not be charged automatically after your plan expires.


How to Convert Spotify Music to Any Format
In this part, we’ll take Spotify as an example to show you how to convert Spotify music to different audio formats using MusicFre. You will learn how to select Spotify as the source, log in to your account, browse music, adjust output settings (such as format, bitrate, and sample rate), and finally convert and locate your downloaded files.
Step 1Launch MusicFre and Set Output Preferences
Open MusicFre on your computer. By default, it will enter the Spotify Music Converter module.
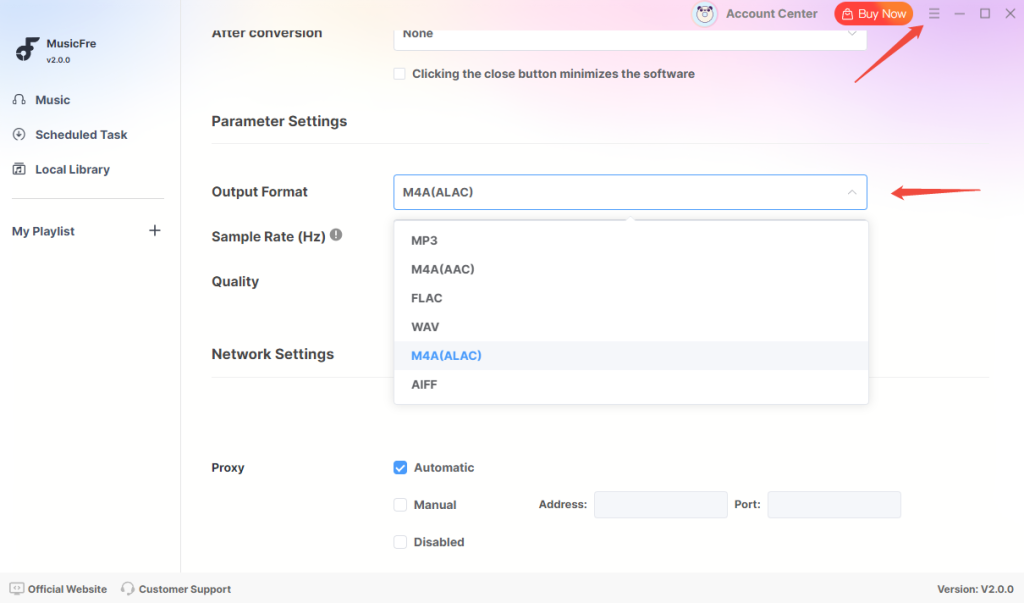
Before selecting music, it is recommended to customize your output settings first. Click the “Menu” icon in the top-right corner and go to “Preferences”.
Here, you can choose your desired output format, including MP3, WAV, FLAC, AAC, M4A, etc. You can also adjust audio parameters such as bitrate, sample rate, and channel. After that, select your output folder where the converted files will be saved.
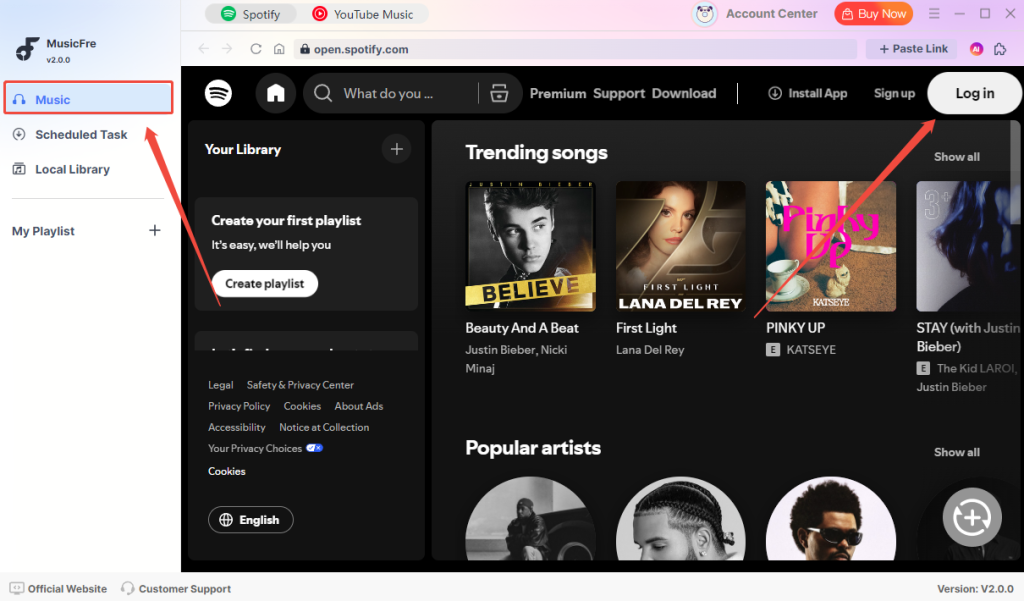
Step 2Log in to Spotify Account
Go to the “Music” tab on the left sidebar. On the main interface, you will see the built-in Spotify web player.
Click “Log in” and sign in with your Spotify account. After successful login, you can access your music library, including playlists, albums, and liked songs, directly inside MusicFre.
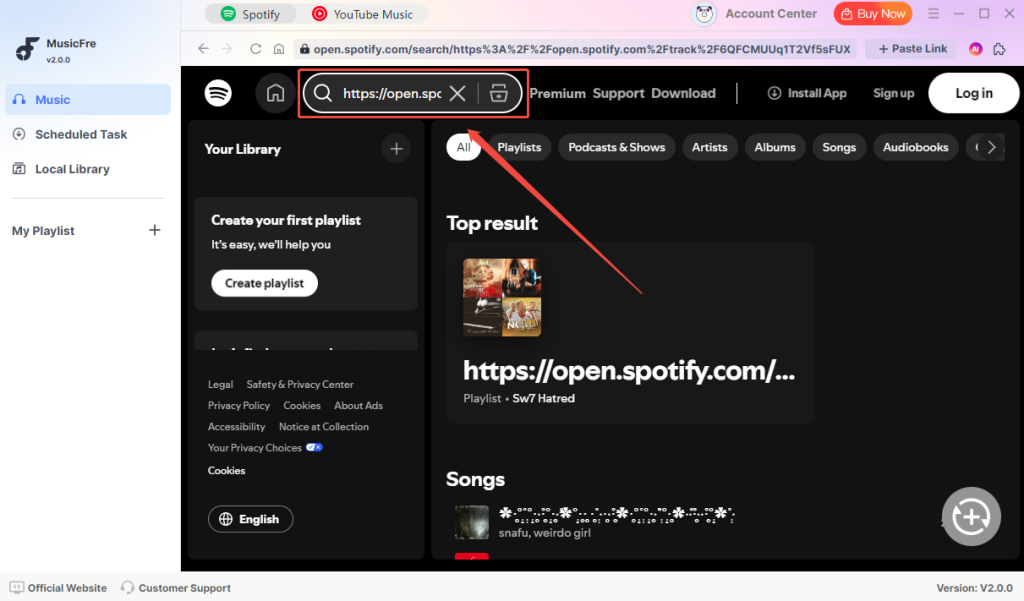
Step 3Browse and Select Spotify Music
Use the built-in Spotify player to browse or search for the music you want to convert.
You can search by song name, artist, album, or playlist. If you already have a Spotify link, simply paste it into the search bar to quickly locate the content.
Open the playlist or album to view all available tracks.
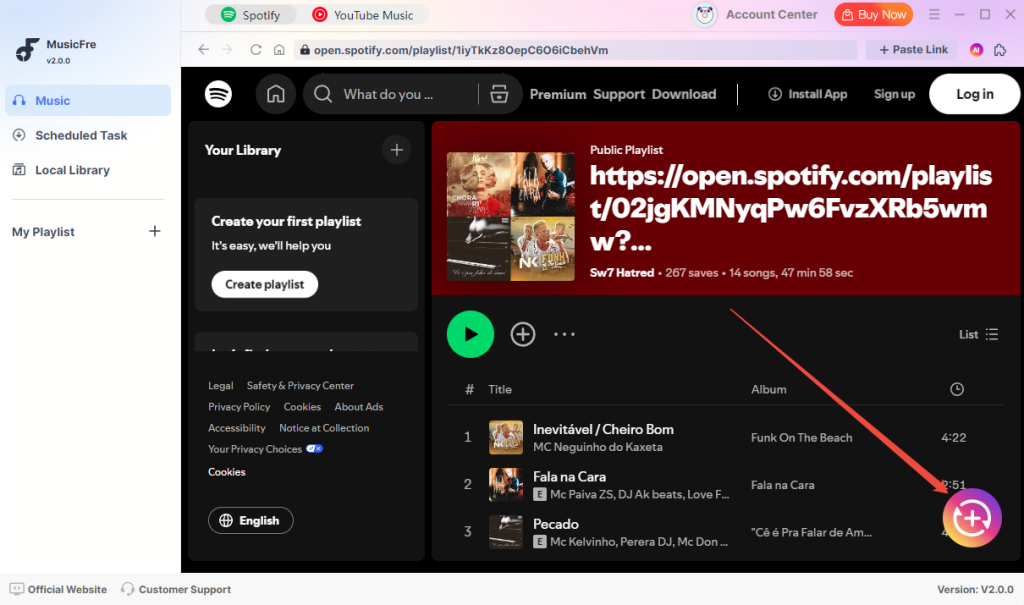
Step 4Add Music to Conversion List
Once you have selected your songs, click the “Add” button (usually shown as a “+” icon).
All selected tracks will be added to the conversion queue. You can review the list, remove unwanted songs, or add more tracks from different playlists before proceeding.
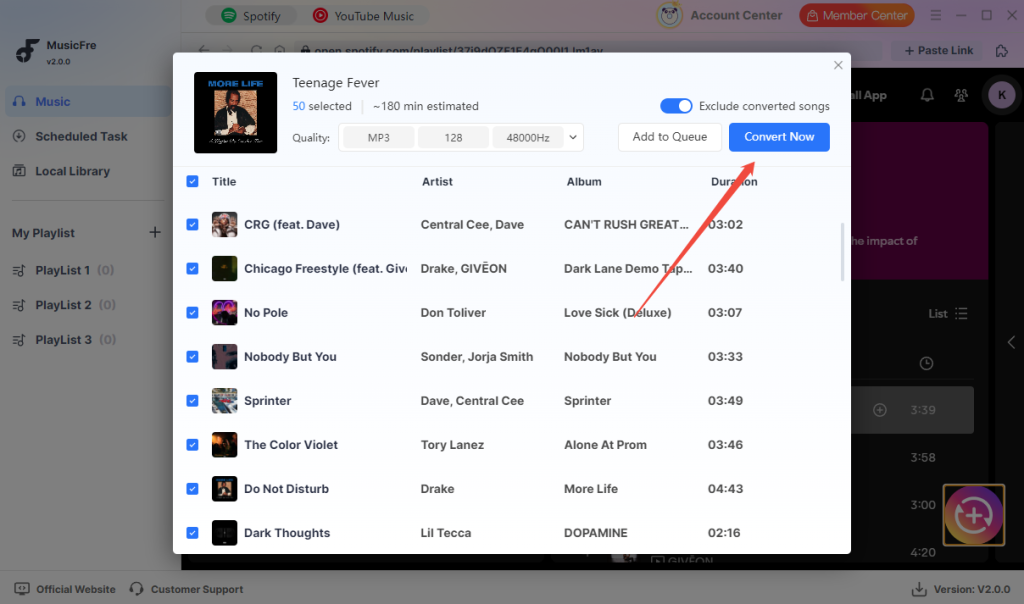
Step 5Convert Spotify Music
Click the Convert button to start the conversion process.
MusicFre will automatically download and convert Spotify tracks according to your selected output settings. A progress bar will show the status of each song in real time.
You can pause or remove tracks from the queue if needed during the process.
Step 6Locate Your Converted Files
Once conversion is complete, your music files will be saved to the output folder you selected earlier.
Click the History or Folder icon to quickly access your converted files. You can also sort, search, or play them directly within the software using the built-in audio player.
How to Convert YouTube Music to Any Format
In this part, you’ll learn how to convert YouTube music into different audio formats using MusicFre. You can search for videos or paste links, customize output settings, add tracks to the conversion list, and download your converted files with ease.
Step 1Switch to YouTube Converter and Set Output Preferences
Launch MusicFre on your computer. By default, the program opens the Spotify Music Converter module. To convert YouTube music, click the “YouTube Music” tab on the main interface to switch to the YouTube Converter.
Note: Before proceeding, open the “Menu” in the top-right corner and select “Preferences” to configure your output settings. Here, you can choose your preferred format (such as MP3, WAV, FLAC, AAC, or M4A) and adjust parameters like bitrate and sample rate. You can also set the output folder for saving your files.

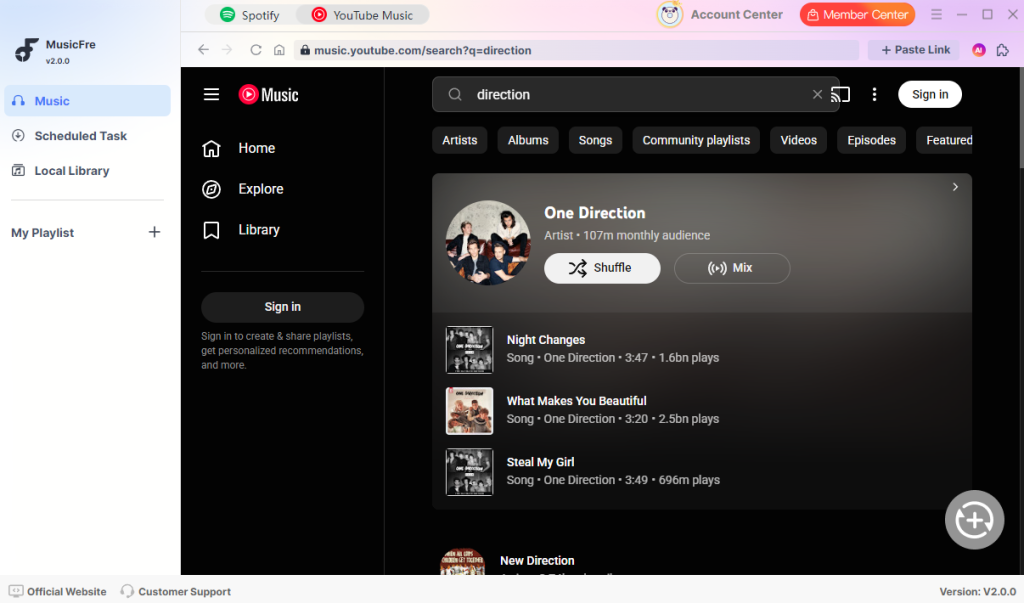
Step 2Search for YouTube Music
Now, go to the “Music” tab in the left sidebar. In the built-in YouTube web player, you can directly search for the music you want to convert.
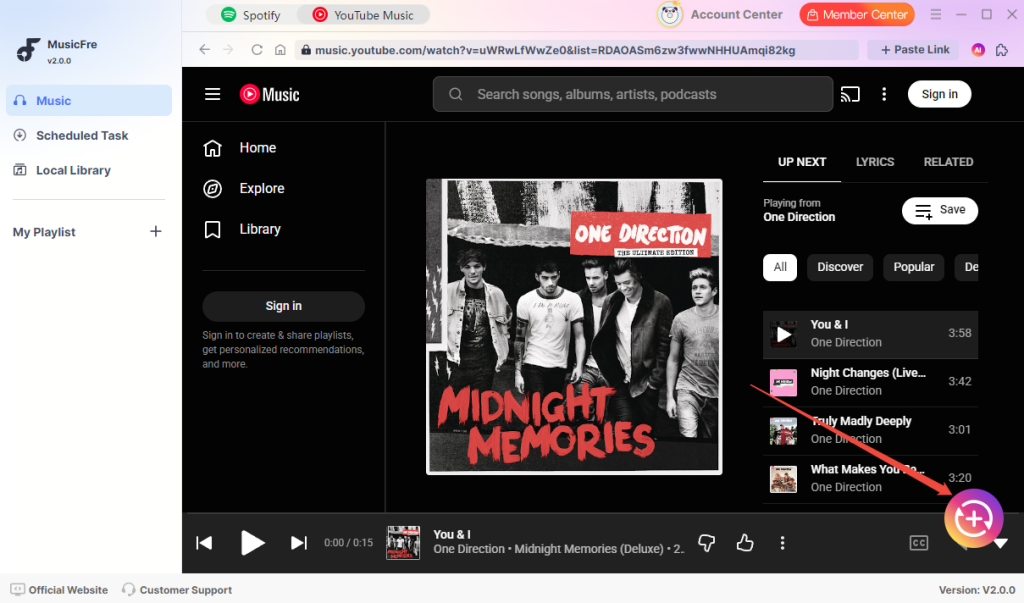
Step 3Add YouTube Music to Conversion List
Once you find the music you want, click the “+” add button. The selected tracks will be added to the conversion queue. You can review the list, remove unwanted items, or continue adding more videos or playlists before conversion.
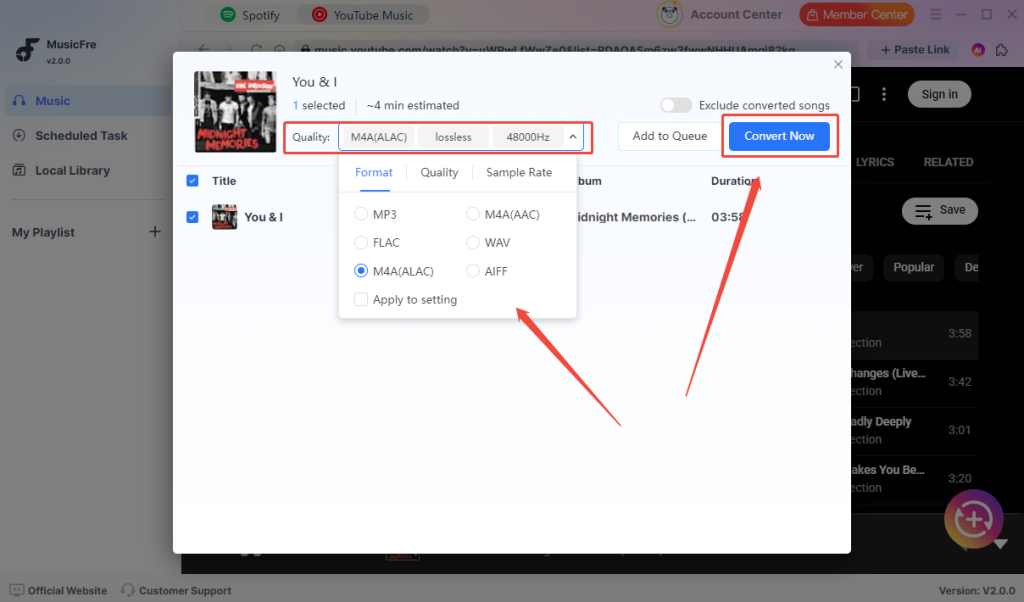
Step 4Convert YouTube Music
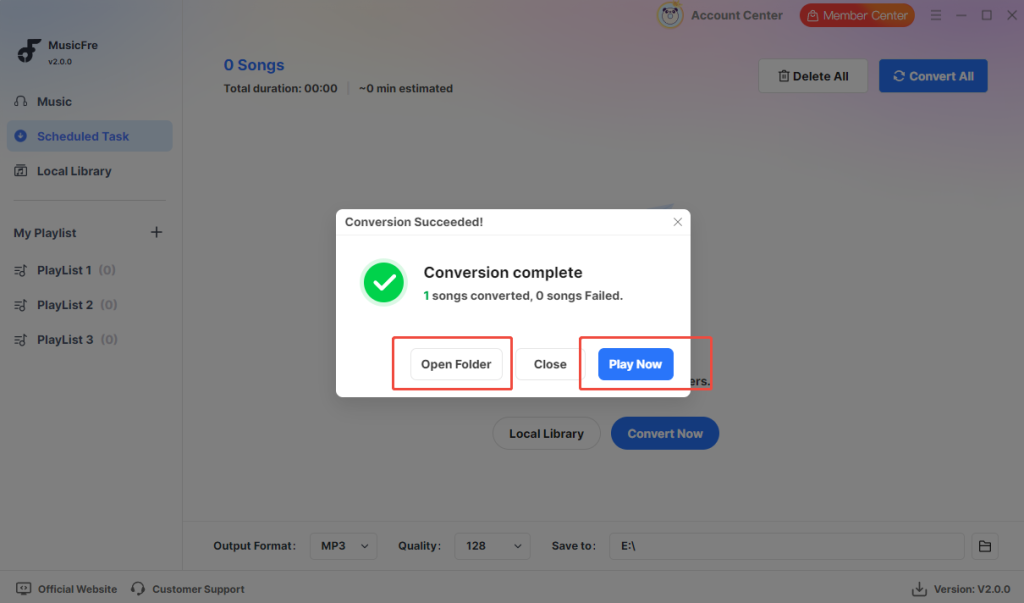
Click the “Convert Now” button to start converting YouTube music. You can also adjust the output format, quality, and sample rate in the settings before conversion. During the process, you can check the progress in the “Scheduled Task” panel.
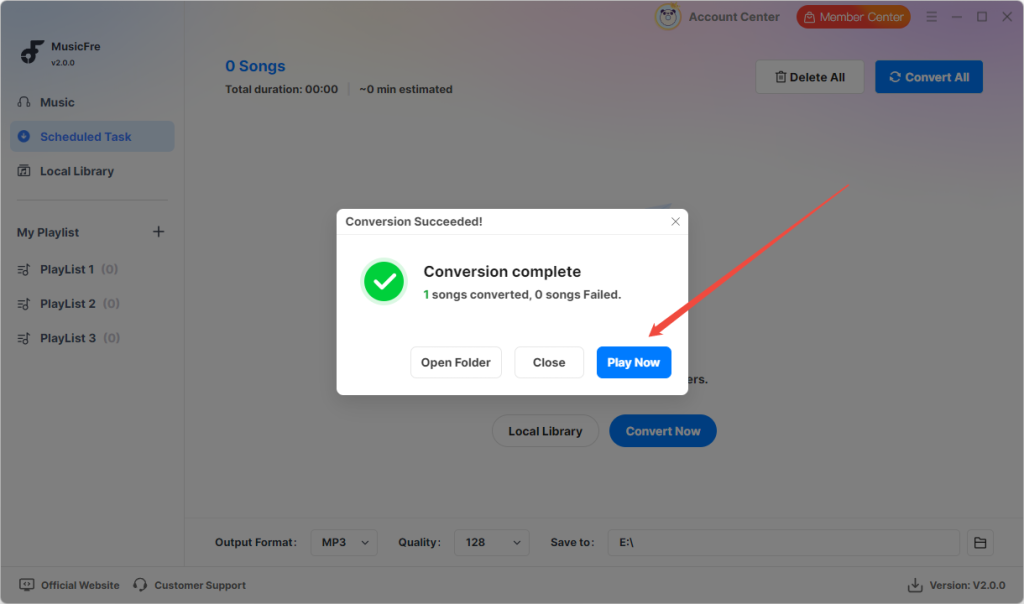
Step 5Locate Your Converted Files
After the conversion is complete, your audio files will be saved to the output folder you selected earlier. Click “Open Folder” to quickly access your converted files, or click “Play Now” to listen to the music in the built-in player.